
Rechargd.com is reader supported. We may collect a share of sales or other compensation from the links on this page. As an Amazon Associate, we earn from qualifying purchases.
It can be a real pain when your left AirPod stops working. Whether it’s during your daily commute or just when you need to get some work done at home, having one side out of order is more than an annoyance – it’s downright frustrating! Don’t despair we’ve got you covered.
How To Fix Your Left Airpod?
If your left AirPod is not functioning, start by checking that it is charged and properly seated in the charging case. If it is charged and seated correctly, try cleaning the AirPod and checking for debris. If this fails, reset the AirPods & try connecting them to a different device.
If you’re having trouble with your AirPods, don’t worry – we’ve got a list of 12 different ways you can try to get your AirPods working again.
1. Clean Dust Away
Next, make sure that your AirPods are clean. Dust and debris can build up over time and cause connection issues or sound quality problems. This build-up can cause the AirPod to sound quieter, not charge, or both.
To clean your left AirPod and charging port, start by using a Q-tip to gently wipe the bottom metal ring of the AirPod. Next, open the charging case and clean out the left charging port, making sure to get all the way down to the bottom. This can help remove any dirt, grime, or earwax that may have accumulated, which may be causing issues with sound quality or charging.
You can also use a soft damp cloth to gently wipe away any dirt or grime from the surface of each earbud. Avoid using anything abrasive as this could damage the finish of your AirPods.
If you’ve tried the steps above and your AirPods still aren’t working, it may be time to try resetting them. Let’s take a look at how to do that in the next section.
2. Resetting Your AirPods
Resetting your AirPods can be a great way to troubleshoot any issues you may be having with them. Resetting the device will restore it to its factory settings, allowing you to start fresh and hopefully fix any problems that have been plaguing your listening experience.
How To Reset Airpods
To reset your AirPods, first, make sure they are in their charging case and then press and hold the setup button on the back of the case for at least 15 seconds until you see an amber light flashing. This indicates that your AirPods have been successfully reset.
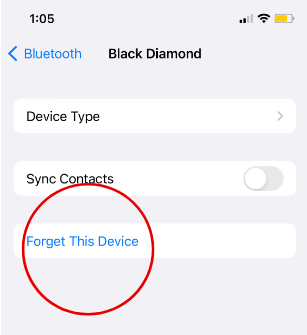
Remove Saved Bluetooth Connection
Then you’ll want to remove them from your saved Bluetooth connection.
Go to Settings > Bluetooth > Info icon next to your AirPod name > Forget This Device. Now, with both AirPods in the case and the lid open, hold the button on the back until the status light blinks white.
If the first attempt at fixing a left AirPod doesn’t resolve the issue, I recommend trying the fix a few more times (2-3). In my experience, it can sometimes take a few resets before the problem is successfully resolved.
Re-Connect Bluetooth
Once this is done, you’ll need to reconnect them with whatever device they were previously connected to (e.g., iPhone or iPad). To do this, open up Bluetooth settings on the device and select “AirPods” from the list of available devices. Once selected, follow any prompts that appear on the screen in order to complete the pairing process.
It’s important to note that resetting your AirPods does not delete any data stored on them – such as contacts or music – but it will erase all custom settings like sound preferences or double-tap shortcuts associated with those particular headphones.
So if you had changed anything about how they worked before performing a reset, these changes will no longer apply after completing one.
Resetting your AirPods can help resolve many issues, so if you’re having trouble with one of your earbuds, it’s worth trying this first.
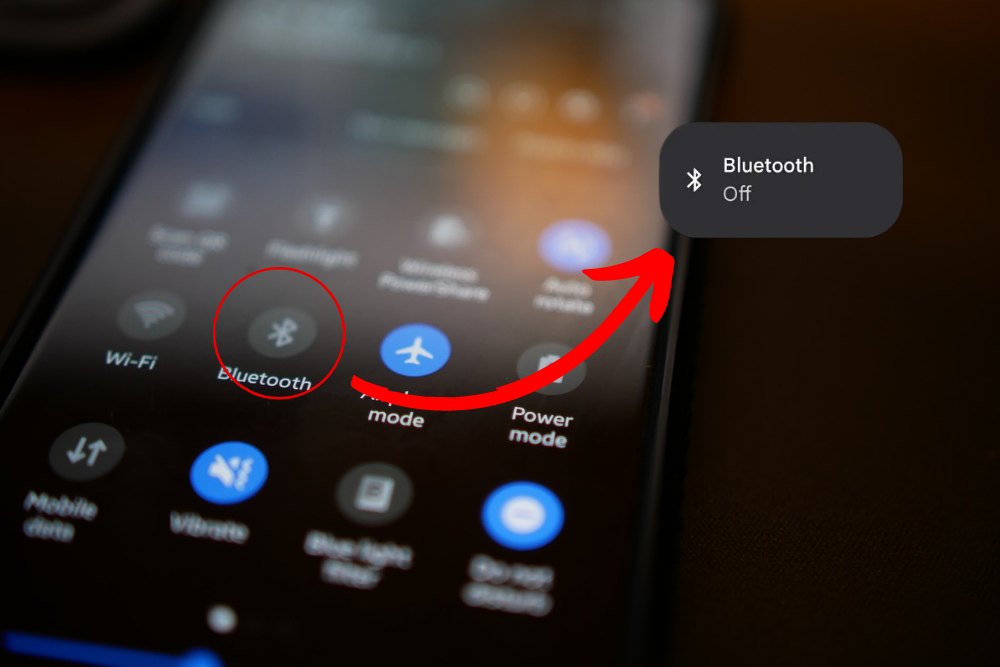
3. Turn Bluetooth Off and Then on Again
If you’re having trouble with your AirPods or other Bluetooth devices, the first thing to try is a simple reset. It’s quick and easy, and it works for me about half the time. To do this, simply swipe down on your home screen and click on the blue Bluetooth icon – turning it grey (off). Wait 20 seconds before clicking again to turn it back on (blue).
If that doesn’t work right away, don’t give up! Try resetting one more time – sometimes all it takes is two tries to get things working properly again. By forcing your phone to reestablish a stable connection between itself and the Bluetooth device, you can often fix any problems you may be experiencing.
4. Turn Off Any Nearby Bluetooth Devices
If you’ve ever experienced an issue with one of your AirPods not working correctly, then you know how frustrating it can be. It’s like having a piece of technology that just won’t cooperate no matter what you do.
But there is hope! One possible fix to get this issue resolved involves turning off any and all Bluetooth devices nearby. This means actually powering them down – no cheating by putting them in sleep mode!
You should also check for other phones, headphones, mouses, keyboards, etc., as they could be causing interference with your left AirPod. Shutting these devices off or “Forgetting This Device” on your iPhone should help avoid any further issues with the device.
Another potential cause of this problem could be that the battery life has run out on one side faster than the other due to different usage patterns between both sides. If this is the case, simply charging up both sides until they are at full capacity should resolve the issue quickly and easily.
Finally, if none of these solutions work for you then it may be time to consider resetting your AirPods altogether using Apple’s instructions found here. While this will erase all settings associated with them (including pairing information), it may just give them a fresh start and get things back up and running again in no time!
5. Make Sure the Audio Volume is Balanced
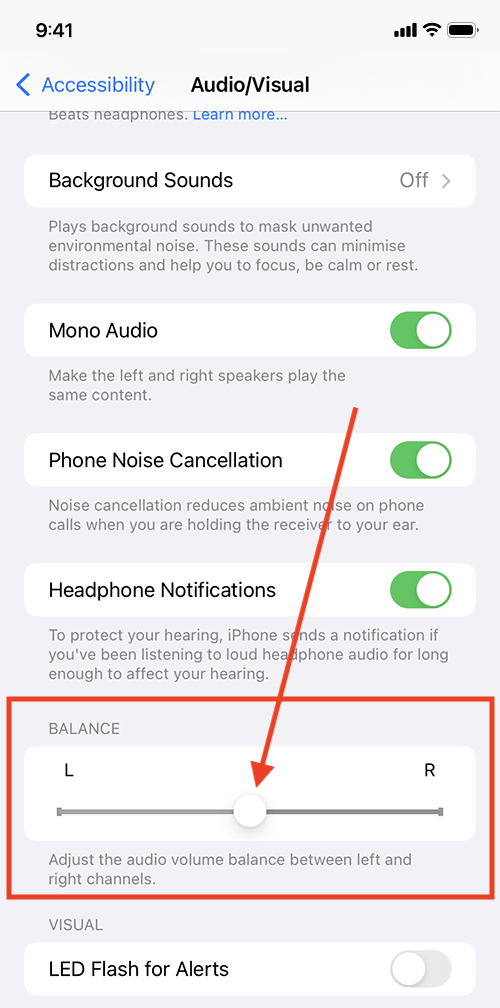
Having trouble with one of your AirPods not working? It could be as simple as an incorrect audio setting on your iPhone.
The “Balance” setting in the Audio section of your phone allows you to set the volume percentage between both AirPods. If this is adjusted all the way to one side, then only that earpiece will play sound. So if it’s off balance, simply slide it back into the middle and you should be good to go.
But what if you want a little more control over how much sound comes out of each earpiece? You can actually adjust each side individually by going into Settings > Accessibility > AudioVisual > Mono Audio.
This feature lets you customize exactly how much sound comes out of each earpiece so that no matter which one you have in, they both provide equal amounts of audio output.
6. Turn Off Automatic Ear Detection
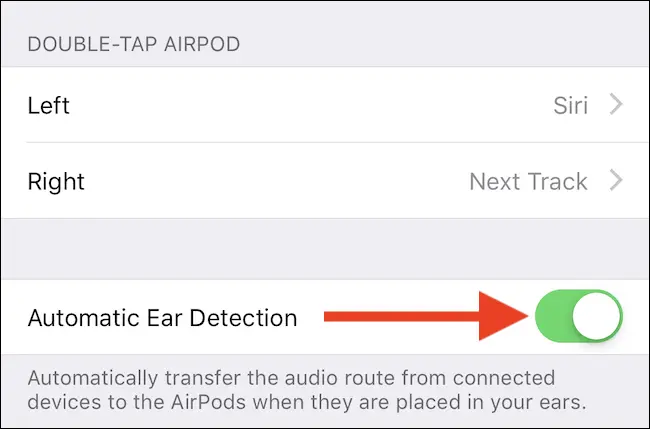
If you’re having trouble with your AirPods not detecting when they’re in your ears, it could be due to Automatic Ear Detection. This is a feature that senses when the headphones are in your ear and keeps playing audio from your device.
Unfortunately, this tech can sometimes act up if there is dirt or grime blocking important sensors on the AirPods. The best way to fix this issue is by turning off Automatic Ear Detection and then cleaning the left AirPod once more.
To turn off Automatic Ear Detection, go into Settings > Bluetooth on your iPhone or iPad and tap the “i” icon next to your AirPods in the list of devices. From here, toggle off “Automatic Ear Detection” and confirm by tapping “Done” at the top right corner of the screen.
Now that you have turned off Automatic Ear Detection, take out both of your AirPods and clean them using a soft cloth dampened with warm water (no soap). Make sure to get rid of any wax build-up around each speaker mesh as well as any dirt or dust particles that may have accumulated over time.
Once everything has been cleaned properly, put back both of your AirPods into their charging case for at least 10 minutes before trying them again with Automatic Ear Detection turned back on. To do so, simply repeat steps 1-3 above but make sure to toggle “Automatic Ear Detection” back on instead of off this time around!
7. Fully Charge Your Airpods
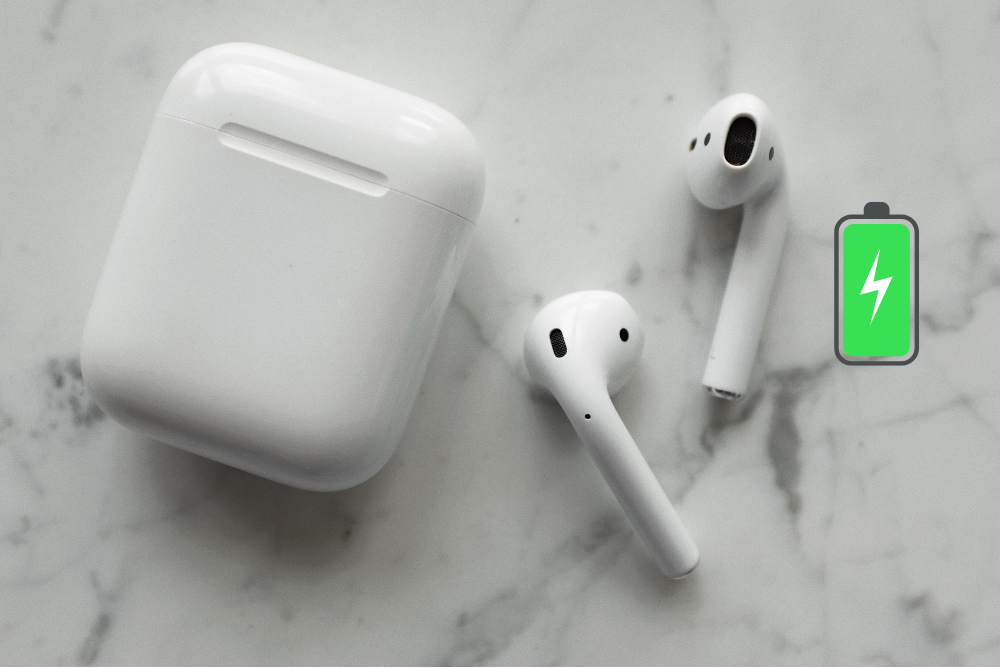
If you’re having trouble with one or both of them, it could be because they aren’t getting enough power. The best way to ensure that they are fully charged is to use an Apple-certified charger and give them a full charge.
It may take a few hours for the AirPods and case to reach 100%, but it’s worth the wait. Even if your AirPods have been working fine, I recommend giving them a full charge every once in a while just to make sure everything is running smoothly.
When my left AirPod starts acting up, I always give it a full charge before doing anything else – this helps rule out any potential power issues as the cause of the problem. It also gives me peace of mind knowing that my headphones are at peak performance levels!
So if you’re having problems with your AirPods, don’t forget about charging them! A quick trip to the wall outlet can help get things back on track quickly and easily – no need for expensive repairs or replacements!
8. Restart Your Phone
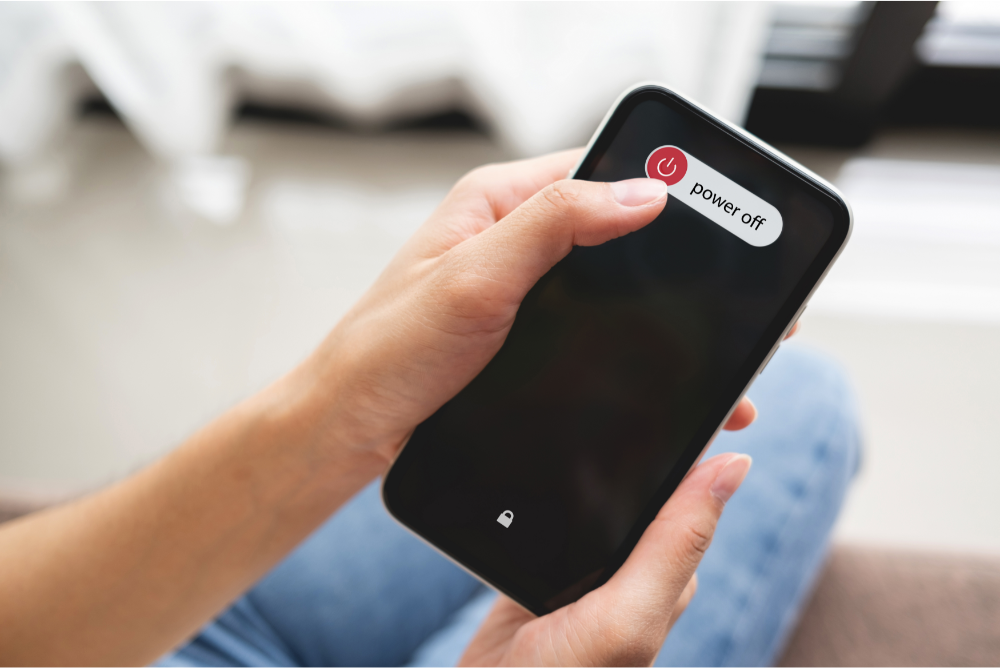
Sometimes the issue isn’t necessarily with your AirPod, but instead, it’s caused by your phone. There are two simple ways to reset your phone that could help solve the problem.
The first is simple: just fully power down your phone. You’d be surprised how many issues you can solve by doing this old-school fix.
When you power off and then back on again, it clears out any software issues that may have been causing problems in the first place.
To do this, press and hold both the side button (on newer iPhones) or just the side button (on older versions).
The second way to reset your iPhone is to Reset Network Settings. This action removes all previous connections and disconnects you from any active networks you’re on – so if something’s gone wrong while connecting up with Wi-Fi or Bluetooth, this should sort it out for sure!
To do this go into Settings > General > Reset > Reset Network Settings – make sure everything looks right afterward though as passwords will need reentering etc…
So next time things aren’t working quite right with your iPhone don’t panic – try powering down completely or resetting network settings before giving up hope entirely!
9. Check for Updates
It’s always a good idea to check for updates on your device. Whether it’s an iPhone, iPad, Apple Watch, or AirPods—updates can help keep your devices running smoothly and efficiently.
Why Check for Updates?
Updates are released by the manufacturer of the device in order to fix bugs and improve performance. They may also include new features that you didn’t have before! It’s important to stay up-to-date with these updates so that you don’t miss out on any improvements or fixes. Plus, if you’re having trouble with something specific on your device, checking for updates could be the solution! In my experience, this solves a lot of issues.
How To Check For Updates
The process of checking for updates varies depending on which type of device you have. Generally speaking though, all iOS devices will prompt you when there is an update available. You’ll see a notification pop-up telling you that there is an update available and asking if you’d like to install it now or later. If this doesn’t happen automatically then simply go into Settings > General > Software Update and follow the instructions from there!
What If There Are No Updates Available?
If no updates are available then unfortunately there isn’t much else that can be done at this point other than troubleshooting further. However, it’s still worth periodically checking back in case any new software has been released since last time as this could potentially solve whatever issue(s) you were experiencing previously.
Checking for updates is a great way to make sure your AirPods are up-to-date and functioning properly. If that doesn’t solve the issue, read on.
10. Get Creative!
When it comes to troubleshooting technology in the home, sometimes the best solutions are the most creative ones. If you’re having trouble with your AirPods not charging or connecting properly, there are a few simple things you can try before calling Apple Support.
Compressed Air to Remove Debris
First off, check for any debris that may be blocking the lightning port on your case and clean it out using a paperclip or toothpick if necessary. This is especially important if you have pets or small children who may have gotten something stuck in there! You can also use compressed air to blow out any dust or dirt from inside the case as well.
11. How To Contact Apple Support (Last Resort)
If you’ve tried all the troubleshooting tips, resetting your AirPods, and checking for updates but still can’t seem to get them working properly, it may be time to contact Apple Support. There are several ways to do this.
The first way is by phone. You can call 1-800-MY-APPLE (1-800-692-7753) and speak with an Apple representative who will help you diagnose the issue and provide solutions or further instructions on how to fix it. Make sure you have your serial number handy as they may ask for it during the call.
Another option is using their online chat service which allows you to talk directly with a support technician via instant messaging. To access this service, simply go to Apple Support and click “Chat Now” at the bottom of the page – then follow the prompts until you are connected with a live agent.
You also have the option of visiting an Apple Store near you where Apple staff members will be able to answer any questions that come up while trying to resolve your issue in person. Just make sure that when making an appointment at one of these stores, specify that it is regarding AirPods so they know what kind of assistance they need to provide.
Finally, if none of these options work for you there is always email support available from Apple as well. Simply send them a detailed description of what’s going on along with any relevant information such as serial numbers or screenshots so they can better understand what needs fixing before responding back with their solution(s).
12. Replace the Left Airpod (Sometimes the Only Option)

For starters, if your AirPods are still under warranty (which is typically 1 year from the purchase date), Apple will cover the cost of repair or replacement. This is definitely worth looking into before shelling out any money on a new pair!
If it has been more than a year since purchasing your AirPods and they’re no longer covered by warranty, then buying a single earbud as a replacement may be an option. The cost for standard AirPods is around $70 while Pro models will run closer to $90 per bud. While not exactly cheap, this is much better than having to buy an entirely new set!
When ordering a replacement earbud from Apple directly online or at their retail stores make sure that you select “left” or “right” when prompted so that you get the correct side for your headphones.
Additionally, keep in mind that all repairs and replacements come with 90 days of limited warranty coverage so if something goes wrong within that time to frame it should be taken care of free of charge again by Apple.
FAQs About Left Airpod Not Working
Q: Why is the left AirPod not working?
A: There are several possible reasons why your left AirPod may not be working. The most common cause is that the battery of the AirPod has run out and needs to be recharged.
Another possibility is that there is a problem with the connection between your device and the AirPod, or an issue with Bluetooth on either device.
Lastly, it could be a hardware issue with the AirPod itself, such as dirt or debris blocking one of its components. If none of these solutions work, you should contact Apple Support for further assistance.
Q: What to do if the right AirPod won’t work but the left one will?
A: All the steps listed in the article will apply equally to the left and right AirPods.
